Make Your Flight Photos Legendary
One of the best things about paragliding is the content you take home. Unlike skydiving (where you're falling too fast for clean shots), paragliding's slow, stable flight produces stunning, sharp photos and smooth video that look incredible on social media.
Here's how to make sure your paragliding photos are the best they can be.
Choose the Right Package
At OCPD, your pilot captures everything using a mounted GoPro — no selfie stick struggles needed.
- Package A (₱3,500) — Flight only. Bring your own memories (but you might regret not having photos!).
- Package B (₱4,000) — Flight + GoPro video. You get the full flight recorded — takeoff, soaring, landing.
- Package C (₱4,800) — Flight + video + photos. This is the one we recommend. You get both video highlights and individual photos pulled from the best moments.
Trust us: after landing, every single passenger says "I wish I had the photos." Package C is the way to go.
What to Wear for the Best Photos
Your outfit choice significantly affects how your photos look:
- Bright, solid colors — orange, red, yellow, turquoise, and white pop beautifully against the blue sky and green mountains
- Avoid dark colors (black, navy) — they blend into the harness and don't stand out
- Avoid busy patterns — stripes and complex prints look messy in action photos
- Sunglasses — add a cool factor to every shot. Aviators or sporty styles work best. Use a strap!
- Hair — tie it back or wear it in a braid. Loose hair blowing across your face ruins otherwise perfect shots
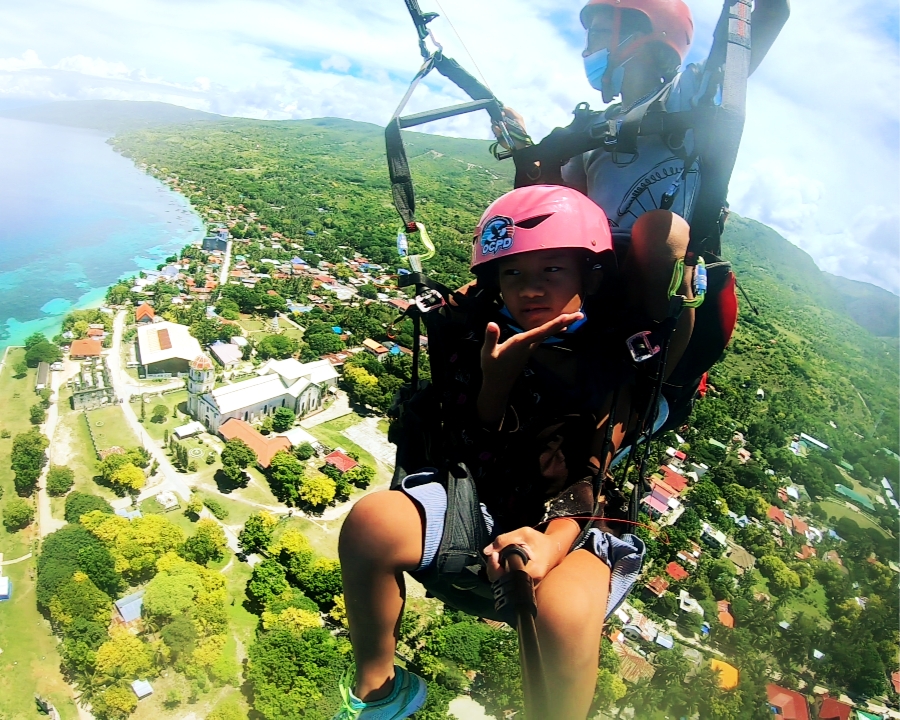
Best Poses During Flight
Your pilot will prompt you for photos at the best moments, but here are poses that always look great:
The Classic Arms Out
Spread your arms wide like wings. This is the most iconic paragliding pose — it captures the feeling of freedom and looks amazing with the landscape behind you.
The Peaceful Look
Close your eyes, tilt your head back slightly, and smile. This conveys pure bliss and makes for a beautiful candid-style shot.
The Point
Point at something — the sea, a mountain, the horizon. It creates a dynamic composition and gives the photo a sense of story.
The Thumbs Up / Shaka
The universal "this is awesome" gesture. Simple, energetic, always works.
The Genuine Reaction
Honestly? The best photos are often the unposed ones — your real reaction during takeoff, the moment you see the view, the pure joy of floating. Let your emotions show.
Best Time of Day for Photos
- Morning (9-11 AM): Soft, warm light. Lower contrast. Great for portraits. This is the best time for photos.
- Midday (11 AM-1 PM): Bright, high-contrast. Sky looks bluest but shadows can be harsh on faces.
- Afternoon (2-4 PM): Golden light starts to develop. Warm tones, dramatic shadows on mountains. Beautiful for landscape shots.
If photography is your priority, book a morning slot for the most flattering light.
Should You Bring Your Phone?
You can, but we don't recommend it for photos. Here's why:
- Risk of dropping it — at 1,700 feet, there's no getting it back
- Shaky footage — holding a phone one-handed while strapped in produces blurry, shaky video
- The pilot's GoPro is better — it's mounted securely, captures ultra-wide angles, and the pilot knows exactly when to shoot
- Enjoy the moment — you only get 8-15 minutes up there. Looking through a phone screen is a waste of the experience
If you must bring your phone, use a wrist strap and a secure zip pocket. But seriously — get Package C and leave the photography to the GoPro.
After the Flight
Your photos and video will be sent to you digitally after the flight. From there:
- Stories/Reels: The video is perfect for Instagram Reels or TikTok — the takeoff and aerial views are mesmerizing
- Profile photo: That arms-out shot with the Cebu coastline behind you? New profile pic.
- Tag us: Share your photos and tag OCPD — we love seeing your experience!
Ready to get the shot of a lifetime? Book Package C at OCPD and fly home with photos that will make everyone jealous.